DAW Setup
You can use Freepiano as a virtual MIDI keyboard to other applications, this tutorial will guide you do the basic configuration.
Install a virtual MIDI driver
The first step is to install a virtual MIDI driver. If you already done that, you can skip this step.
Please download and install MIDI Yoke. It is free and works well on my Window 8 64bit laptop.
When done, you’ll find 8 more virtual MIDI input and output devices in you system.
Config Freepiano to use a MIDI output.
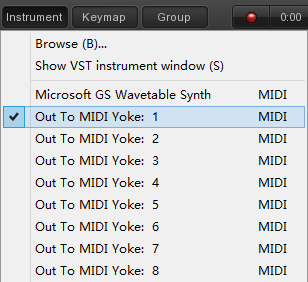
We need send MIDI signals to other application, select a virtual MIDI device on ‘Instrument’ menu:
When output through MIDI, the audio synth function in Freepiano is nolonger needed, you can select a Null output device to prevent conflict with ASIO or other exclusive output in other applicaiton:
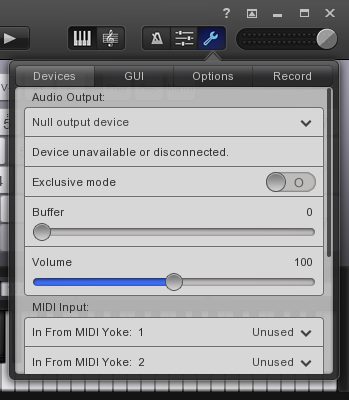
Please DO NOT select MIDI input device in Freepiano unless you known what you are doing. A MIDI device loop will force Freepiano disconnect some MIDI device.
Now you have Freepianno configured. But now press a key will not generate any sound, you need an application to receive MIDI signals.
Config Cubase to use virtual MIDI input.
Here I use Cubase, but any other application (Including another instance of Freepiano) is similar.
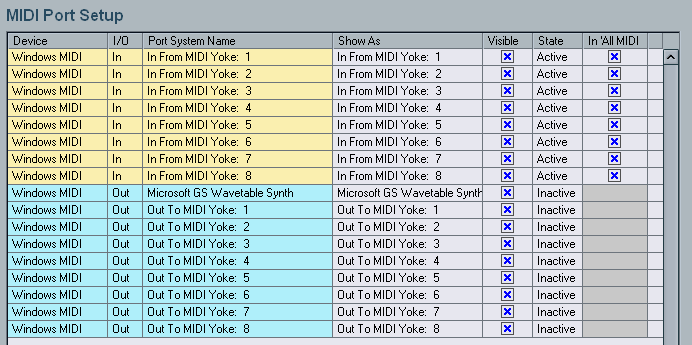
Active one or all MIDI input devices in MIDI Port Setup:
Now you have two application connected by use a virtual MIDI device, Add a track and try to play some note in Freepiano to see the effect.